|
Server Installation |

|

|
|
|
Server Installation |
|
|
Server Installation
|
Server Installation |
|
|
|
|
Server Installation |
|
|
Note: Only an authorized network administrator should perform this installation procedure.
| 1. | Log in into the server PC with administrative privileges. Server installation procedure should be run from the server PC. |
| 2. | Choose (or create if needed) RAM Commander installation folder. It must be shared with full access rights and mapped as a network drive for all RAM Commander users on the network. Folder name should contain only Latin characters and numbers, without spaces or special and national characters (Hebrew, Chinese etc.). For example, choose C:\APP\RAMC32. Then C:\APP folder should be shared on server and mapped as network drive by workstations. |
Note: It is highly recommended to set up a automated backup procedure for this RAM Commander folder on the server (e.g. C:\APP\RAMC32 in the example above) to prevent loss of valuable data like reliability data libraries, particular projects and analysis cases.
| 3. | Run RAM Commander installation package (run installation file downloaded from our web site or RAMC\setup.exe file from RAM Commander installation CD). |
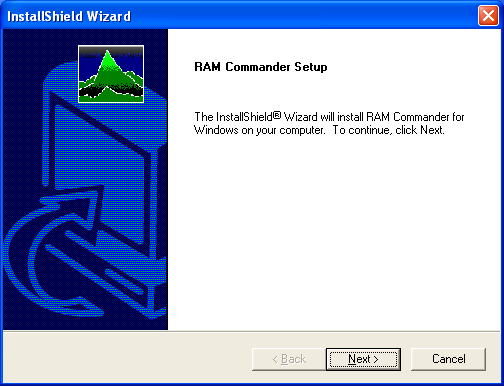
| 4. | The Installation Wizard will go through a sequence of the setup screens asking the user to make the appropriate selections. Press Next on the first screen. |
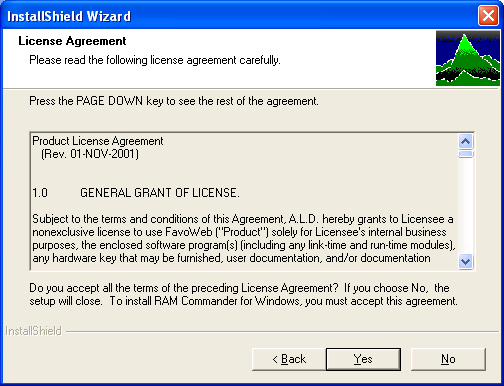
| 5. | Confirm the License Agreement (Yes button): |
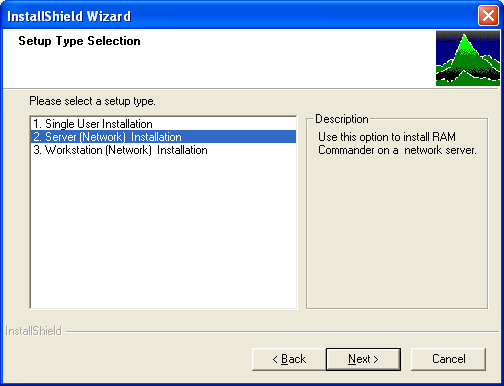
| 6. | In the Setup Type Selection box, choose Server (Network) Installation: |
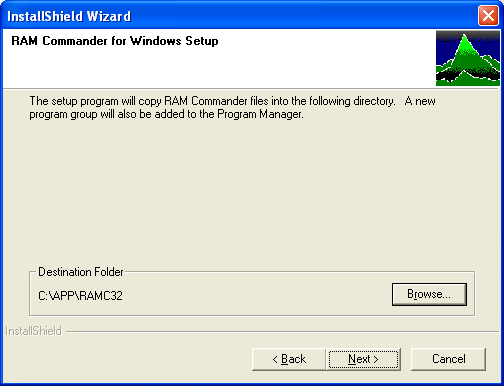
| 7. | Specify the RAM Commander installation folder – it should be the folder which will be shared later for all RAM Commander workstations plus RAMC32 subfolder, for example C:\APP\RAMC32, where C:\APP will be shared on server and mapped by workstations. |
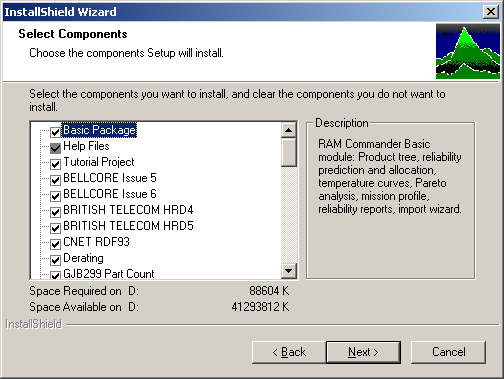
| 8. | RAM Commander displays a Select Components dialog box. Click Next. |
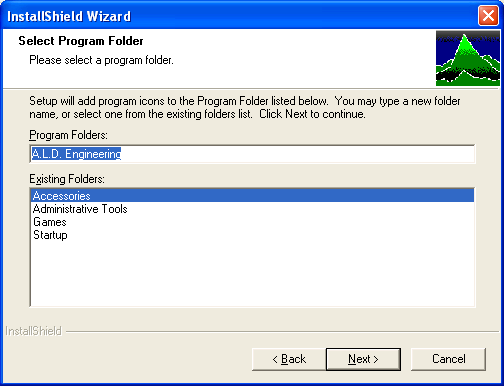
| 9. | Select Start menu folder where RAM Commander icons will be located and Click Next. |
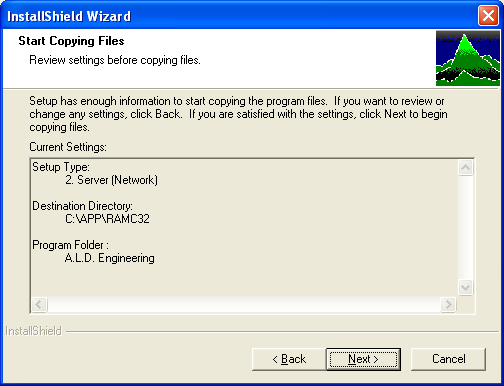
| 10. | Press "Next" on "Review settings" dialog: |
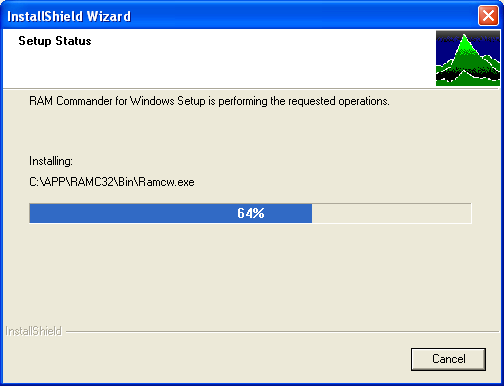
| 11. | The Installation Wizard will copy necessary files: |
| 12. | If this is the first time Ram Commander is installed on the computer, the Edit user parameters dialog box is displayed. Enter system manager User Name, Password (optional) and Group (optional) and click OK: |
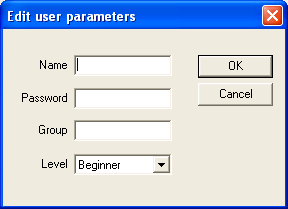
Password is optional.
Groups are used by RAM Commander to control access privileges. Access to the projects may be denied for the users according to their groups (see Project Definition in Chapter 8).
Level is optional.
See Users Management paragraph later in this manual for more information about the user parameters definition.
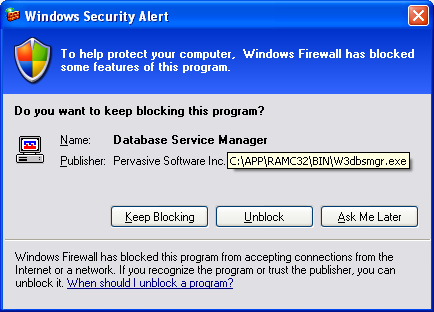
| 13. | Windows Security Center / Windows Firewall Warning message may appear - press "Unblock" button (message may appear on different installation steps or event when the installation is finished): |
| 14. | Choose Finish on the last installation wizard screen in the last screen of the Installation Wizard.: |
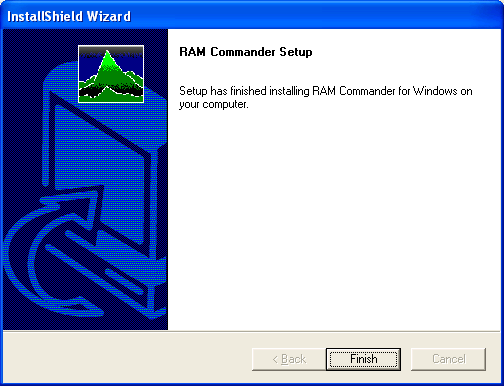
| 15. | RAM Commander is installed on the server. |
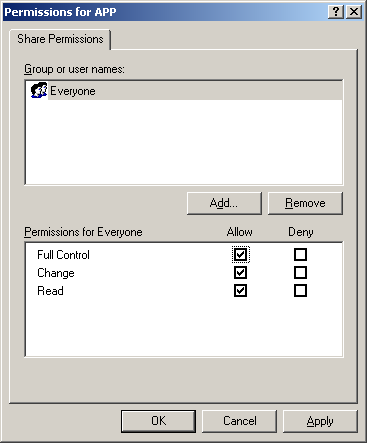
| 16. | Share selected installation folder (e.g. C:\APP in this example) for all RAM Commander users, give full control permissions for this folder to all RAM Commander users: |
| a. | Enable folder sharing: |
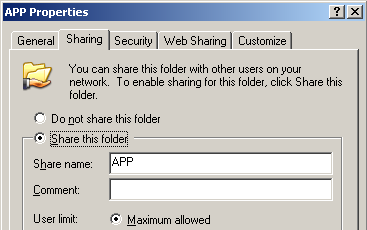
| b. | Give Full Control permissions to all RAM Commander users: |
| 17. | Now that you have installed RAM Commander on the server, the next steps are to install RAM Commander on workstations and install/configure software license. |
Note: You cannot run RAM Commander on the server.